Guide to Brand24: How to Filter by Groups in Your Social Media Monitoring Project

What can you do with Groups in your social media monitoring project?
Think of Groups as folders and the mentions you collect as files.
As you go through your mentions to get a clearer picture of how your latest campaign or project is doing, organization becomes your window into clarity.
Data-based insights are valuable. They are the brick and mortar that your strategic foundations are based on. They provide you with a quantitative perspective into the effectiveness of what are often qualitative ideas behind your business strategies.
And if your team is equipped with access to a powerful social media monitoring tool like Brand24, then you’re rich with data. Which is great, but also a bit overwhelming.
Unless you have an efficient way of organizing it all.
Enter, Groups.
Creating and using Groups will organize your mentions for faster and more in-depth analysis.
When your mentions are organized into groups, you can:
- generate analysis reports for individual groups
- set up e-mail and mobile notifications for individual groups
This will save you so much time as you learn to use Brand24 to go even deeper into your analysis.
Here are some tips on how you can filter by Groups to organize your social media monitoring projects:
- Separate mentions for each keyword in your project so you can examine them individually.
- Separate mentions by sentiment.
- Separate mentions by influence.
- Separate mentions that were found from a particular website.
- Separate mentions by any other factor. Create a Group for all the mentions that were collected on a day when you experienced a surge in volume of mentions. Generate an analysis report to get insight on what caused this.
- Separate particularly noteworthy mentions. If you find some important mentions, even if you’re not quite sure what they have in common, create a Group for them to make them more visible and easier to find later.
- Separate mentions for customer service:
- Mentions which have already received a response
- Mentions which have not already received a response
- Separate mentions by the team member(s) that responded.
- Separate mentions by type (other than sentiment or influence):
- Inquiries
- Complaints
- Compliments
- Suggestions (these can give you insight into how to improve the next edition of your product and/or how to improve the current user experience)
- Separate mentions by order of importance. On days when you’re strapped for time (basically, every day), organize your mentions by order of importance so you know what needs to be taken care of first:
- Critical or negative mentions that need to be addressed immediately. Here is a detailed post with an infographic about how to take care of situations like this.
- Urgent mentions that need to be acknowledged, but which will require a more thorough response later
- Mentions that are not super urgent, but still deserve a response
There are many more ways you can filter by Groups (it all depends on what you need). These are just some tips to help you get started.
Remember that you can create individual analysis reports and e-mail and/or mobile notifications for each group, not only for entire projects. Group mentions any way you want to.
Just consider all the ways you’d like your data to be analyzed, create groups for them, and use the Analysis Tab in Brand24 to get instant insights.
Now, here’s how to create groups, get analysis reports, and set up e-mail and app notifications, step-by-step:
How to create a Group in your social media monitoring project
The video below will show you how to create groups in under 2 minutes.
Not able to watch videos now? That’s okay. Just scroll down to find step-by-step instructions listed below.
Enter your project. In the search field, just above the list of mentions, input a term that you want to group by.
If, for instance, your project were to monitor keywords Boston Red Sox and New York Yankees, and you wanted to create separate groups for each keyword, you would enter Boston Red Sox.
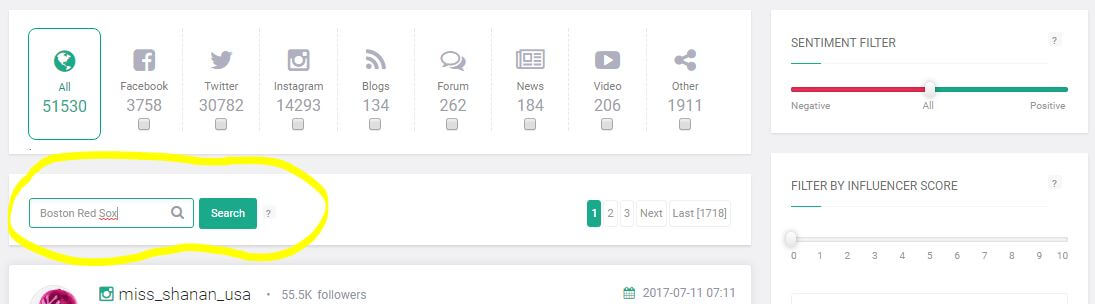
Click on Search and you will see a list of all the mentions that contain Boston Red Sox.
Go to a mention and mouse over Group. A drop-down menu will appear. Under +Add New Group, just enter a name for your new group (like Boston Red Sox).

To quickly add all the mentions on a page to a Group, scroll down to the bottom of the list. There, you’ll find the button Select All. Click on it.
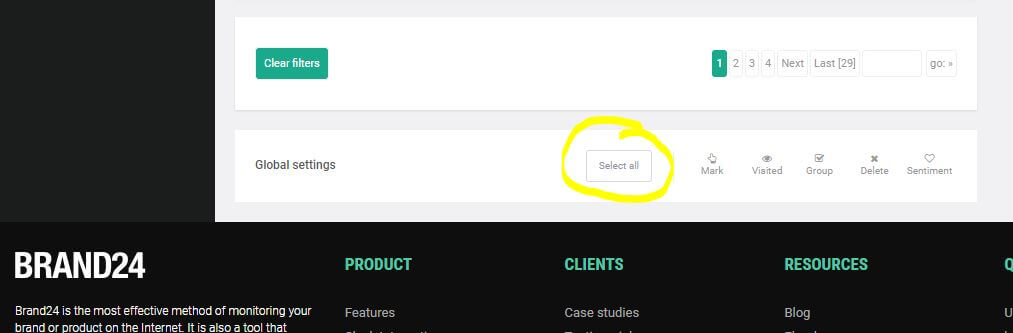
You’ll see that all the mentions on that page have been selected (the boxes on the bottom right corner have been checked).
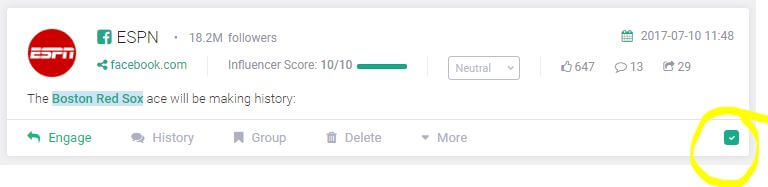
Along the bottom of the list of mentions, you’ll also see an icon that says Group. Click on it and a list of available groups will appear. Select the group you want to put your mentions in.
(All the mentions in a project will still appear together in the dashboard. Creating a Group simply gives you the option to view and analyze only these selected mentions whenever you want.)

Create as many groups as you want. To view them, go to the list of filters on the right-hand side of the page.
On the bottom of the list, you’ll find the Show additional filters button. Click on it and the bar will expand.
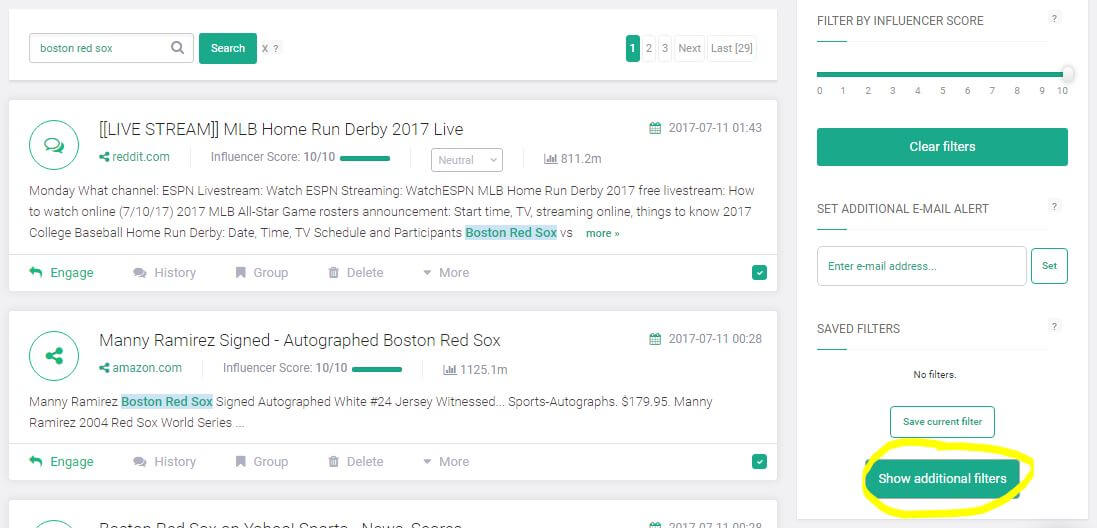
You’ll find all the groups you created under Filter by Groups. Click on one of them to view your selected mentions.
How to create analysis reports for an individual group
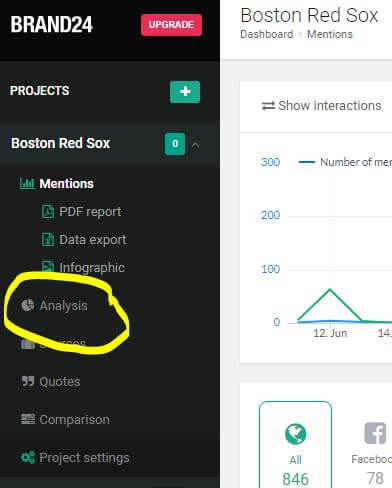
First, enter your project. Once you’re in the dashboard, select Analysis from the sidebar on the left.
The Filter Mentions button can be found along the top of the page. Click on it.
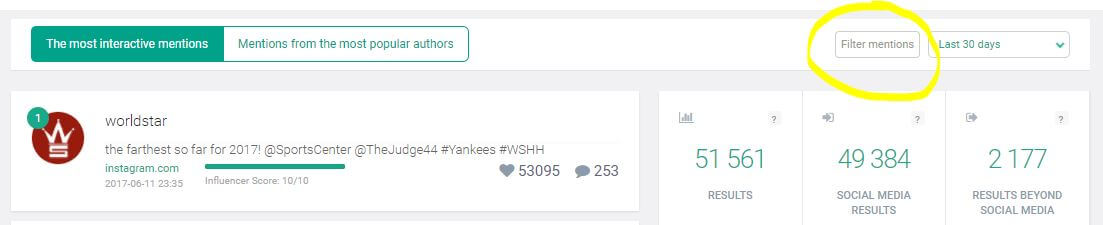
A pop-up window will appear. Scroll down until you find the group you want to analyze, listed under Filter by Group.

Click on Close to exit the pop-up window. You will now see a deeper analysis of the mentions in that group, not for the entire project.
How to set up email and mobile notifications for an individual group
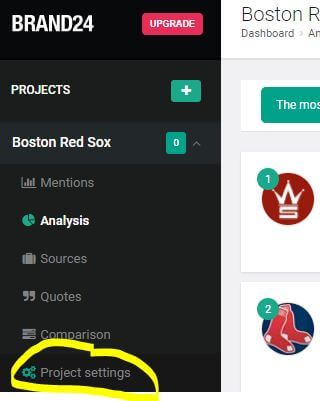
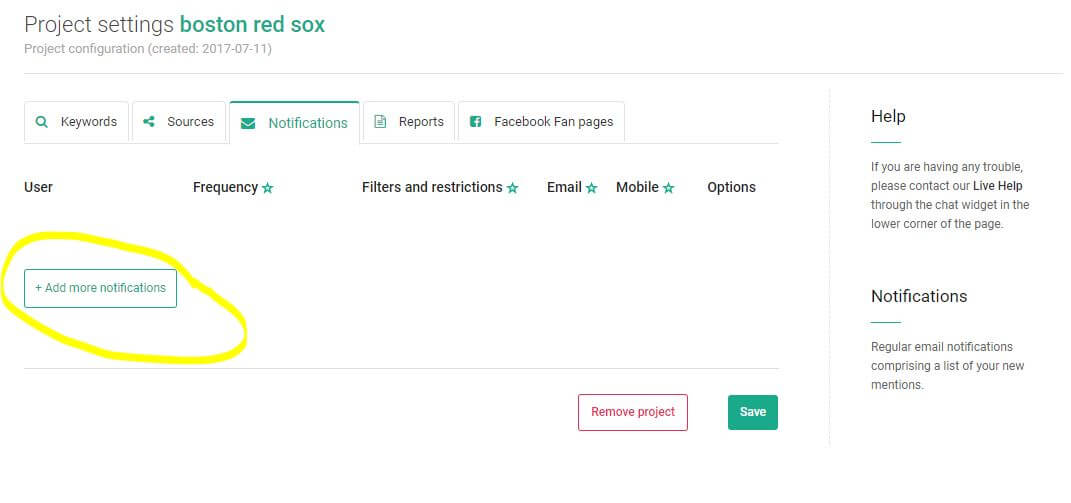
Start from your project dashboard. This time, click on Project Settings from the sidebar.
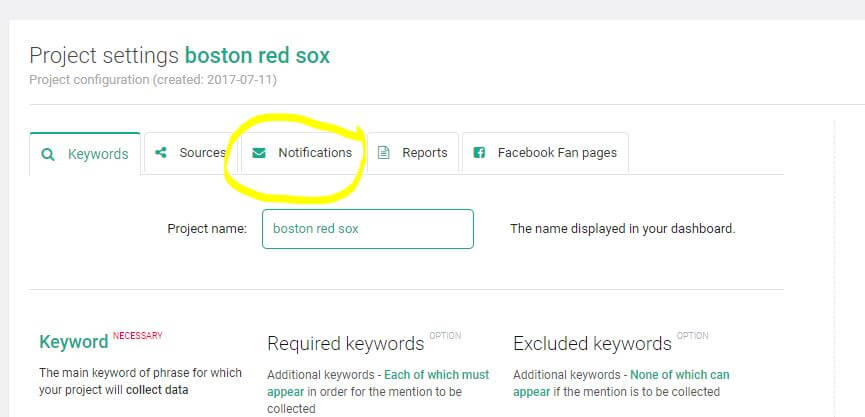
Near the top of the page, select Notifications.
Select +Add More Notifications.
A pop-up window will appear. Input the requested information, and on the Filter line, you can select +Add new filter.
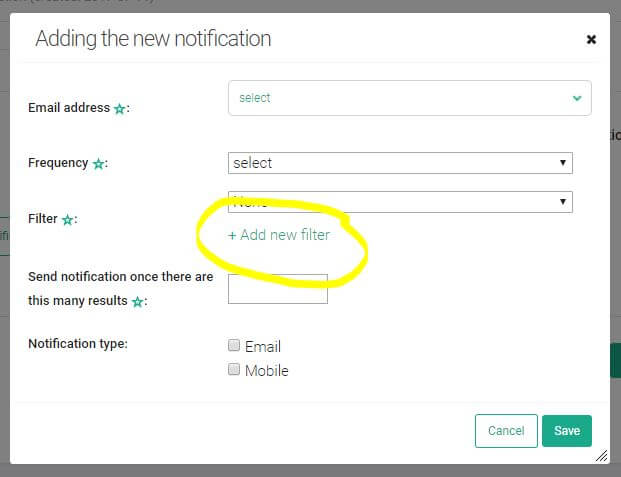
A list will appear. Scroll down until you find the group you want to receive notifications about. All groups are underneath Filter by group.
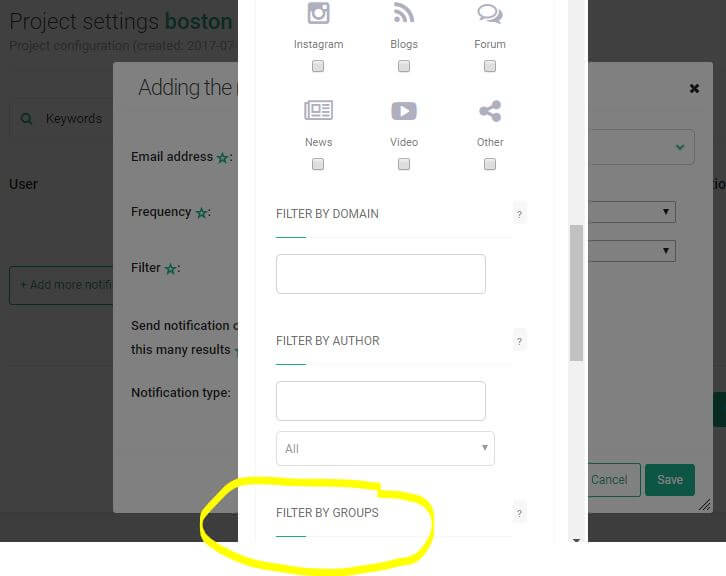
Click on Close to exit the pop-up window and now you’ll start receiving e-mail and/or mobile notifications about the mentions in that group, not for the entire project.
Create and use Groups in your social media monitoring projects to save time and get deeper insights
Don’t have a Brand24 account yet? Sign up for a free trial and take it for a spin.
Remember to filter Groups in your projects so you can spend less time analyzing and more time developing your business.
HANDPICKED RELAVANT READS
Brand monitoring tips and tools [2020 update]


![What is Social Media Monitoring? Best Practices and Powerful Tools [2022]](https://brand24.com/blog/wp-content/uploads/2017/11/rockets2-min-640x300.jpg)